Always, Katie: 2017


Friday, June 23, 2017

Completely Amazing, Super-Easy, 4-Ingredient Chocolate M&M Cookies


I am always on the lookout for a new delicious but quick and easy cookie recipe! They're my favorite type of dessert for taking to meetings, reunions, carry-in meals, etc because they're fixed serving sizes and easy to take in leave-behind containers with no serving utensils to find before leaving. These chocolate M&M cookies definitely fit the bill! I made the original Rolo recipe (from Lolly Jane) for my Trades of Hope launch party, and they were so easy that I decided to play around with them a bit. I'd been craving a good soft M&M cookie for a while, so that was my first adaptation. I made them for Ethan for Father's Day, and I plan to make them again for a family reunion this weekend. 

[This post contains affiliate links. If you click through my link and make a purchase, I will earn a small commission at no extra cost to you. I only recommend products I use and love!]

They call for four ingredients, and I don't even use my stand mixer to mix the dough up. It's THAT easy... I use my mixer for everything! ;-) But this comes together quickly and easily in a medium mixing bowl with a silicone spatula.

Go ahead and use a store brand cake mix... you can't tell the difference, I promise. :-) 

Ingredients:

1 Box Devil's Food cake mix
1/2 C oil
2 eggs
M&Ms (to taste)
(Optional: chocolate chips, crushed peanuts to taste.)

Preheat oven to 350*. Prep some cookie sheets (I love these!) with foil. In a medium mixing bowl, mix cake mix, oil, and eggs. (If you're adding chocolate chips and/or peanuts, add those now and incorporate.) Roll dough into one-inch balls (I have this scooper. I'd never seen one like it before, but I think it works really well and is so much easier to me than the usual kind), and place on foil-lined sheets, a few inches apart. The cookies spread quite a bit. :-) Bake for 8-10 minutes. When you remove the cookies from the oven, immediately press M&Ms gently into the tops of them. Work quickly, the M&Ms settle in best when the cookies are still very soft and warm.  

Makes approximately 3 dozen. Ish. :-) 


Sunday, June 18, 2017

Creating a Dynamic Shadow Box (+ 50ish ideas of things to use as fillers)


Not long after the kids were born, I made shadow boxes for each of them and hung them next to the shadow boxes from our wedding and honeymoon. But... I hated the new ones! I finally got around to fixing them to my usual (read: not still post-op and pre-sleeping-through-the-night) standards ;-)

Here's a before and after (although, technically I guess it's an after and before, but that feels super awkward to say. Try it. See?): 


I had included one of the blankets from the hospital (we sent them home with the babies' scent for Charley), the handmade hats they were given in the Special Care Nursery, the buttons the staff gave Ethan (It's a Girl! It's a Boy!), their hospital bracelets, and cord stumps and clamps. Yeah, I'm the mom that held on to those. ;-) I also stuck a post-it note in each one as a placeholder for whenever I got around to printing newborn pics, haha! As you can see, the placeholders were still holding that place two years later! 

I was unsatisfied with the original shadow boxes almost from the beginning, and a big reason why is my first shadow box tip: Use a deep box. I love these that I got from Hobby Lobby, because they have adjustable depths. Even the shallowest is pretty roomy, though, and you're going to want that. See how the baby blanket in the "before" box is all squished up against the glass, and all of the other items are even more squished? It makes it look flat, messy, and somehow unintentional. Like I just threw stuff in and hoped for the best! Which, let's be honest... isn't really incorrect.

Now, once you have your box and before you've touched any of your treasured keepsakes, we need to talk supplies. Please please don't cut corners on this! Make sure any papers, adhesives, embellishments, baggies, etc that you put in that box is archival quality. Should be acid- and lignin-free... almost anything you find in a scrapbook section at a craft store should qualify. But you do NOT want to risk your precious mementos to sub-par materials! Nobody's paying me to say this. I just want what's best for you. ;-)

Next, as you're choosing items to put in the box, dig out everything you can find that's even kind of a candidate to go in it, and take stock of what you have. Sort it by priority... the things that have to be in it or there would kinda be no point in doing the box, the things that you'd really LOVE to have in it, and the things that are cool and would probably be neat fillers. Aim to have some large/dimensional items, some flatter ones, and some items in between sizes. If you don't really have any flatter items, consider using pictures from the event you're commemorating. And either way, I also recommend picking up a few pieces of scrapbook paper that coordinate with the items or the theme of the box to cover what is usually a relatively unsightly background of the box (in my case, black plushy stuff). You can cut that to size and pin it in with straight pins.


Here's the fun/frustrating/satisfying part: test your layout. Test it a lot. Tweak it. Re-tweak it. If you find a layout you think you may like, take a picture of it on your phone, then tweak it to something you may like even better. :-) 

While you're testing your layout, arrange the must-have items first. You can create dimension by clustering larger items together and leaving areas where the flat items or background paper show through. Think of it like decorating a shelf - something deep, something flat, something to bridge the gap. :-) 


For paper items (like my kids' names that were on my door and their bassinet cards), use an archival safe plastic baggie with a little extra room at the top. Secure them to the background with straight pins through the extra plastic, avoiding piercing the paper itself. Baggies are great for small items that you can't or don't want to pin or tape down, too... like my kids' cord stumps. :-)

I pin everything to the backing with straight pins. I try to use them that coordinate with my box (lots of pink pins in Abbie's, blue and white ones in Sam's), just in case they're visible, but whenever possible, I try to conceal them behind either another object, or between layers of the item itself (like clothes or hats). Take a picture of your final version of the layout before you start pinning things down. Then, start at the back and work your way forward! It helps to remove as few items as possible before pinning, though, to preserve the spacing and such that you like.


Okiedokie! So now you know how to build an awesome shadow box! So, um... whatcha gonna put in it? Here are some ideas of things I've done, things I want to do, things I've seen done, or things I really want someone to do so I can see it!

  • Wedding. (Use invitations, programs, boutonniere, table favor if it's small and non-perishable enough, garter, aisle flower petals if they're dried or silk, picture of the bride and groom or the whole wedding party...)
  • Vacation. (Use maps, brochures from excursions or attractions, ticket stubs, receipts (these do fade almost without fail, though), currency if it's an international trip, small items that remind you of a specific way in which the destination was different (from our European honeymoon, I kept an empty can of Coca-Cola Light), trinkets from gift shops, shells or a baggie/bottle of sand from a beach...)
  • Day Trip. (I've done two of these using 5x7 shadow boxes. I use one 5x7 photo as the background, and a small item. For our day trip to the D-Day beaches in Normandy on our honeymoon, I used a picture of Ethan and me, and a small corked jar with sand from the beach in it. I also made one using a picture of my MIL, Ethan, and me; a small corked jar of some of the teeny gemstones, and a few of the larger ones from one of those "mine your own gems" we went to on a trip to Asheville, NC. The boxes are deep enough that they make a ledge at the bottom that the jars and stones can rest on.)
  • Pet. (Either to commemorate baby days - a favorite baby toy, their first collar, first leash, baby pics, baby blanket; or as a memorial to a deceased pet with similar items.)
  • First home. (Picture, impression of key in clay, dried leaf from favorite tree...)
  • Graduation. (Program, ceremony ticket, cap, tassel, confetti from party, dried flower from "congrats" bouquet, year trinket...)
  • Special Party - Anniversary, engagement, promotion, graduation, shower etc. (Invitation, napkins, dried florals, picture, table decor, ribbons from gifts...)
  • Hobby/Extracurricular Activity (Dance shoes, programs, first jersey, game ball, ribbons, varsity letter/s, certificates... I have one of ticket stubs from concerts/etc, and one with the small SWAG from Geocaching...)

I hope this has given you some ideas for your own shadow boxes, and some guidance on how to tackle the project, but of course - rules are made to be broken. ;-) Experiment and see what you love! And then come back here and tell me about it!


Monday, June 12, 2017

Basement on a Budget: Intro, Rationale, Plans

Our kids currently share a nursery, for tons of reasons... including the reason that we only had one bedroom open to stick them in when they were born ;-) Their nurse practitioner warned us at their 18 month well-child appointments that they'd probably start climbing and that they'd most likely be climbing out of their cribs by 3.

We had decided that when we moved them into toddler beds, we wanted to give them their own rooms, too. The problem is: we have four bedrooms upstairs, but they're all currently full. There's the master suite (and I'm not moving out of it!), the current nursery, a guest room, and my craft room (that kind of resembles a Michael's store that's been hit by a tornado). 

The plan is for one twin to stay in what is now the nursery, and for the other to move into the current guest room. But then that leaves the guest room furniture without a home.


We don't entertain overnight guests all THAT often, but it's nice to know it's an option. So we're going to move the guest room across the hall to the smallest of the bedrooms... the one that my craft stuff is currently filling to the brim. :-)

Welllll... that explosion of crafty goodness has to go SOMEwhere! So we turned our attention to our unfinished basement. When we bought the house, the previous owners had started to finish it. so we have a gorgeous, mostly finished bathroom down there, and a little bit of framing, a cable drop, and a fireplace. Because of course. :-) My original vision was to make a little guest apartment/game and TV area down there, with one of the framed-in rooms becoming the guest bedroom and putting a little kitchenette in another little part, then have the biggest framed-in room as a storage room with doors to hide the stuff. But then as Ethan and I are talking through this and walking around our basement daydreaming, we kept coming back to the fact that we just... don't have that many guests! Can we justify a whole mini apartment for the off chance that somebody will want to spend the night once a year or so? DUH! 


So he starts talking about putting my craft room down there, in what was going to be the bedroom. Our basement is a walk-out, so there are windows and a door on one side, with two of those windows in what we were assuming would be the storage room. Seems like a waste of good daylight, and the stuff we're storing in there now doesn't even take up half of the available space, so we decided on this final plan: the basement will have a storage room (in the windowless but framed-in "bedroom"); a little nook with our big freezer, a mini-fridge, some cabinets, and a table for playing games or eating snacks; a sitting area with a TV mounted above the fireplace; my craft room/studio/office with a surprising amount of natural light; and lots of open space for the kids to be kids. :-)

I am BRIMMING OVER with excitement about this project, and I plan to take y'all with me through the whole shebang! We're trying to be very thrifty about the whole thing, without compromising quality, and I have some fun ideas about how to do that that I'm looking forward to sharing. We'll talk finishing, basement-friendly floor coverings, paint swatches, picking palettes, inspiration/mood boards, DIY projects, decor, and clever shopping. Hopefully I'll encounter some great companies along the way that I can tell you all about, too. Yay!

YAYY!!!


Sneak peek: This is the tentative palette I plan to use for my craft room. :-) I picked some Sherwin Williams paint chips up at Lowe's, and have been keeping them handy for motivation and inspiration. And then I made a collage of the same colors using their website and picstitch so I can have my palette at my fingertips on my phone. :-) It feels so bright and cheerful and will allow me to incorporate a few decorative items I've already picked up (because I have weak impulse control when it comes to pink pineapples, apparently). :-) I think that surrounded by lots of white, these happy colors, and inspirational craft supplies, my creative juices will overflow! Yay!


Thursday, May 25, 2017

Honeysuckle and the Wellspring of Life


There’s honeysuckle in my backyard.

Like, a LOT of honeysuckle.

And it smells amazing. Step out of my house and the heady fragrance grabs you by the arm and urges you to skip to the mailbox instead of walking like a grown-up because OMG SPRING!

I love the smell of honeysuckle.

But it’s a killer.

I didn’t realize this until I took a botany class in college and my professor could be derailed into a 45-minute tangent with just the mention of the word honeysuckle. It’s an invasive species, and it grows quickly and selfishly, choking the life out of whatever is unfortunate enough to share its space.
But it’s gorgeous and it smells like happiness. It’s deceptive. Insidious.


I’m a bit of a people-pleaser. I’m not sure that’s a perfectly accurate label, but I do genuinely bend over backwards to make others happy, to make their lives easier, to do the things I “ought” to do. I want to be needed and valued, and in that irrational little part of my brain that is still an insecure teenager, I’m pretty sure that the only way to be needed and valued is to say “yes” to everything.

This has led to some admittedly cool things. This year I was the newsletter editor for my twin mom club, and it was a neat opportunity. I modernized some things and got to work closely with some amazing women I may or may not have gotten to know so well had it not been for my board position. No regrets. It has allowed me to be there for friends in crises. I could never regret being a listening ear for my hurting friends.

It has also led to some unhealthy behaviors, ignoring my own physical and mental health needs to give of myself until it literally hurts.

This nearly compulsive need to serve is the honeysuckle in my life, and my numerous commitments are the sweet-smelling blossoms, springing from the persistent and overwhelming branches. They’re great! Very pleasant, beautiful, not necessarily negative on their own. But their dominance in my life and in my backyard have been ultimately unsafe.

As I was reflecting on how such wonderful things can have such a negative impact, I remembered a verse from Proverbs that is often quoted to young people as encouragement to practice abstinence… “Keep your heart with all vigilance, for from it flow the springs of life” (Proverbs 4:23 ESV).


I’ve been tired. Pretty much all the time. It’s a physical tired, sure; twin toddlers will do that do a woman. But I’ve also been emotionally, mentally, and spiritually weary. As I’ve turned the honeysuckle and wellspring metaphors over and over in my head, I’ve come to realize that my heart is bruised and cluttered from all of the honeysuckle I’ve allowed to grow in and around it, and it’s affecting the way my life flows. Nobody would argue that the acts of service themselves are bad, but when they stem from a toxic, unrealistic expectation for myself, they are dangerous.

I have been overcommitting myself, pushing myself beyond what I know are my healthy boundaries. I was making myself sick from emotional and physical exhaustion. I have a prescription now for a rescue anxiety drug, because when the occasion comes up where I AM helpless (and feel useless), I have panic attacks.

Guys. This is no way to live. My wellspring has been truly clogged. Think septic tank with roots clogging it. What’s backing up and overflowing from that is not pretty.


It’s a simple fix, but it’s anything but easy. Every day, multiple times a day, I have to remind myself of what my boundaries are and why they stand where they do. Every day (with the help of an increased dose of my main antidepressant) I choose to prune back my need to be needed and my need for approval. As a natural extension of this pruning, I’m letting go of some commitments and placing boundaries around others.

As I enact and fortify these boundaries that guard the wellspring of my life, those who have been able to cross them in the past are faced with a choice. Some respect them. Some don’t understand. Relationships and perspectives are changing. Change is hard. It’s also a process, one that is ongoing and deliberate. I have to choose this new perspective and motivation over and over. But the changes have been positive.

I’m less drained at the end of the day, and when I AM tired, it’s the satisfying burn that comes from a busy and productive day, rather than the dull but crushing ache of the overwhelm and depression. My house is rapidly approaching what I would call “clean.” It’s been a long time since I could say that. I’m laughing more freely, I’m more patient with my toddlers, and I’m able to face small fears with grace. I’m drinking water, cutting back on the caffeine, prioritizing rest (real rest, not depressive lounging), and even started a new small business that I’ve been looking into for a few months… adding another spinning plate, true, but one that is fun and low-pressure, just because I want to! ;-)


Friends, if you feel like your wellspring is clogged, that your life isn’t flowing freely, consider what may be the honeysuckle that is damming up that stream. Do you have unrealistic expectations for yourself? Do you have self-esteem or fear issues that are keeping you from pursuing the things that will make your life flow and your heart sing? Do you need to go to counseling? Back to church? Back to school? How can you uproot these deceptively lovely weeds and clear out your wellspring? I urge you to take stock and make changes! You deserve it! 


Thursday, May 18, 2017

My New Adventure: Empowering Women and Changing the World

I have never been on a mission trip, though I’m passionate about overseas mission work. My diabetes kept me firmly stateside, within a reasonable traveling distance from my medical team, while my church friends went to faraway places and shared their faith while performing tangible acts of love, like building schools or churches. I’d be lying if I said I didn’t feel left out and like maybe I wasn’t being as effective a Christian as I should have been :-)

So, some of my favorite charity organizations have always been those that let you thoughtfully and prayerfully fill a shoebox full of Christmas gifts for little kids in very poor countries, or that let you pay to send animals or other life-changing gifts to families in these same countries in the name of a loved one.

I love the idea of giving a person or family the means to support themselves long-term so that they’re able to lift themselves out of poverty, rather than being given a gift of food or medicine that – while obviously life-saving and important – will run out. I’d rather give them the means to earn the money to afford these things themselves. And I have to believe that in general, those in the position to be on the receiving end of these donations would prefer the dignity in that as well.

Thursday, April 27, 2017

Listen Up! Don't Let the Fear of "1-in-8" Steal Your Hope (NIAW 2017)

Resolve's theme for National Infertility Awareness Week (NIAW) this year is "Listen Up!" What a great time to be able to share something that has been on my heart regarding infertility for the past several months :-)


1 in 8 (the rate of infertility in the US) is SCARY! It's a flippin' SCARY number! It's 12.5%!  I get that! 

But guys, gals, please. Don't let it terrify you. Don't let that fear rule your life. It's not as scary as it sounds. Stick with me...

Monday, April 24, 2017

Of This Much I'm Sure: A Memoir - By Nadine Kenney Johnstone (Book Review)

From time to time, I'm asked to review books on my blog... occasionally, I agree, more often I do not. [This post does contain affiliate links - if you click the link and make a purchase, I earn a small commission at no extra cost to you. Thanks for supporting Always, Katie!] When the email about Of This Much I'm Sure: A Memoir by Nadine Kenney Johnstone came across my "desk," I was intrigued by the summary her agent sent me.

At twenty-two, Chicagoan Nadine Kenney meets her future husband, Jamie, while vacationing in Florida. She soon uproots from her home and family to join Jamie in suburban Massachusetts. Once married, the couple begins trying for a baby.   
Yet neither of them suspect just how tumultuous the path to parenthood will be.
Unable to conceive naturally, Nadine embarks upon a series of infertility treatments that wreak havoc with her health, her emotions and her marriage -- and threaten her life.  From uncommunicative doctors and internal bleeding following an IVF procedure to emergency surgery that leaves her with a six inch scar instead of a baby bump, Nadine endures nearly every trial and tribulation that infertility treatments often bring. All the while, she’s astounded that few if any doctors or couples dare discuss these.
In what seems like a miracle, she eventually becomes pregnant naturally. But the horrors are not over: her unborn son is diagnosed with potentially terminal kidney complications. For the duration of the pregnancy, Nadine and Jamie must live with a profoundly troubling uncertainty about whether and how long their child will survive.
Ultimately, Nadine is forced to come to terms with the stark differences between reality and the notion of “happily ever after” she once harbored, and to recognize that amid great unpredictability the only thing she can be sure of is the healing power of hope and love.

The summary read almost like the summary of the newest, hottest novel... National Infertility Awareness Week (NIAW) was coming up, and I didn't have any labor-intensive collaborative posts on the horizon, so I eagerly sank my teeth into the book.


Thursday, April 6, 2017

10 Cool Items to Put in a Long-Distance Easter Basket (+ a neat way to jazz up your packaging!)


Do you have a long distance friend or family member that you enjoy sending holiday gifts? When I send Christmas gifts to my friends and family out of state, I always wrap the outside of the box in Christmas wrapping paper, then reinforce it with contact paper to protect the wrapping paper from rough handling in transit. 

But I decided to do something a little bit different with my friend's Easter gift this year - I wanted to make it look like an Easter basket full of grass. I used some bright green wrapping paper (got it on clearance after Christmas one year, but it's "neutral" enough for any occasion!) and wrapped the INSIDE of the box! Here's how...

Friday, March 31, 2017

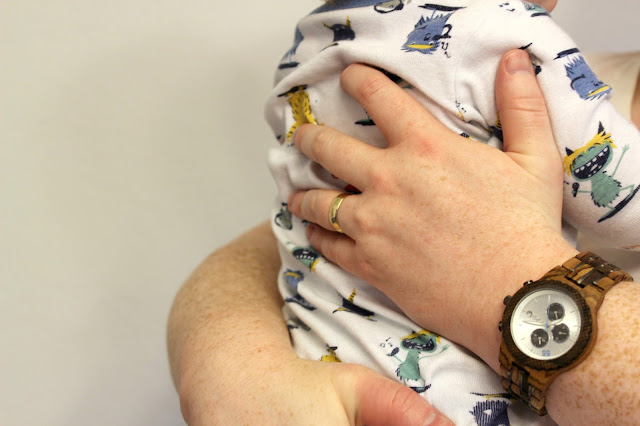
The Truth About Working Dads (+ a JORD Watch Giveaway)

[This post is sponsored by JORD, and I was gifted a beautiful wood watch for my husband as compensation. All opinions and content are my own.]

Being a stay-at-home-mom is hard.

So is being a working mom.

Psychological research and countless blogs back this up, everywhere you look on social media. But do you know what other group has a tough job and I don't think gets acknowledged enough?

Dads.

working dad time gift unique men's wood watch

Thursday, March 9, 2017

7 Tips To Help You Find a Photographer Who "Clicks" With Your Family!


Capturing moments of our kids' lives on camera is so important to Ethan and me. They're growing up so fast, and I find myself already forgetting tiny details from their earlier months, only to be reminded by a picture snapped at just the right time or of just the right feature. We take a lot of dimly lit, blurry, candid iPhone photos, and my job happens to "require" me to get staged pictures with my DSLR from time to time, but we also really value the images captured by a professional photographer and have made it a priority to have professional photos taken of our family every few months during these early years.

Wednesday, February 22, 2017

What's Up Wednesday: February

There's a lot of random stuff ratting around in my head and our life, and I've been wanting to get better about sharing more life updates around here, but I've had such a hard time thinking how or what to share :-) So I'm jumping in on What's Up Wednesday with Shay, Sheaffer, and Mel again, since the prompts are so great and give me a jumping off point :-)

[also: There are affiliate links in this post. If you make a purchase after clicking on one of these links, I'll make a little bit of commission, and it won't cost you anything extra. Thanks!]


What we're eating this week 

Lots of mild foods... and then Mexican food. The kids and I have all had a little stomach virus, so saltines and Sprite Zero have been the mainstays. But when I start feeling better after getting sick, I always crave spicy foods! So I had some awesome enchiladas last night. :-) We've also eaten pre-made mashed potatoes a few nights in the last week, after I processed 10 pounds of potatoes in my Instant Pot. (See my spiffy way of making frugal convenience mashed potatoes here!) 

What I'm reminiscing about


I finally finished up and posted my review of Ripley's Aquarium of the Smokies recently, so I've been reminiscing about that wonderful trip to Gatlinburg, and spending time with Becca. Can't wait to plan another get together! 

What I'm loving

The kids got hair cuts and I got mine colored (for the first time in my LIFE!). I think everyone's hair looks great, so I'm loving it! (Even if my Sam looks like a little man instead of my baaaaby!)


What we've been up to

I've been trying to get organized - blog, home, brain... haha! I'm in a constant state of overwhelm from the process, BUT as each area is getting a little more under control, I'm starting to feel that lovely calm grow. :-) 

What I'm dreading

One of my best friends is having surgery tomorrow, and I'm dreading that for her. :-( I'd love it if you'd keep her in your prayers <3

What I'm working on


I've done a major overhaul on my Pinterest... it's maybe half done, and it has been a ton of work! I've made board covers for a nice consistent look, and I'm working on consolidating and deleting some boards that are no longer really relevant or whatever :-) I'd love if you'd stop by and maybe give me a follow! I've also worked on finding some cool avenues for finding consistently awesome pins to share, so hopefully you'll love what you see!

What I'm excited about

We're getting ready to do some big renovations at home! The kids' nurse practitioner said we'll probably need to move them to toddler beds around age 3, and when we do, we want to separate them into their own rooms. But to do that... we need another bedroom! Currently, we have a master suite, a nursery, a guest room, a craft room, and an unfinished basement. The plan is to finish the basement and move the craft room down there, then move the guest room into the current craft room, and one kid into what is currently the guest room. And redecorate the nursery into a more kid-specific theme, depending on who ends up in which room. :-) Yowza! Lots of fun planning ahead! Lots of work! Of course, we'll be doing it as smartly and frugally as we can, and sharing all the fun with y'all here :-)

What I'm watching/reading

So. Much. Clifford! The kids love watching "dog" on Netflix, and it's one I can actually tolerate, so yay!

What I'm listening to

My usual... Garth, Reba... the other fun older stuff on my iPhone. I haven't really looked up new music in a while. 

What I'm wearing


This new kimono from ThredUP! It's an online consignment store, with some really great deals! Lots of designer steals - I also got a ginormous Vera Bradley cosmetic case that looks brand new for less than $10. If you sign up through this link, you and I will each get $10 credit! And that goes a pretty long way in ThredUP prices :-) 

What I'm doing this weekend

Nothing that I can think of... hopefully cleaning up much less vomit than this past weekend! I'd be fine with just a few days of chillaxing with my favorite people :-) Ugh, it's only Wednesday and I'm soooo ready!

What I'm looking forward to in March

Spring Break!! Sorta like this coming weekend... no plans that I know of, but I love time spent with my whole little family!

What else is new?


Umm... I got new photo lights. :-) To help fight the uphill battle that is trying to take good Instagram and blog pictures during the winter. I've arranged a few more fun sponsorships and deals to share with y'all, so that's new and exciting... hm... I can't think of anything else... what's new with you?


Monday, February 20, 2017

How I Make Frugal Convenience Mashed Potatoes in My Instant Pot

We love the super-convenient mashed potatoes you can buy in the refrigerated section of the grocery store. Mashed potatoes are the perfect side for a lot of our favorite meals, and it's just nice to have some we can easily reheat and serve without doing the whole cooking thing :-)

[also: There are affiliate links in this post. If you make a purchase after clicking on one of these links, I'll make a little bit of commission, and it won't cost you anything extra. Thanks!]

And they're not expensive, necessarily, but I realized that I can make my own (better) mashed potatoes for much less money, and I've been pretty conscious of saving money on groceries where I can. So I've taken to whipping up (get it? haha...) big batches in my Instant Pot when I have some spare time, and freezing them in quart-sized freezer bags. Then I can just pull out a bag or two and reheat them when we want them! 

I estimate that the same amount of potatoes costs about a third to a half of the price when I make them at home as opposed to buying them premade. And it only takes a half an hour, most of which is passive so I can be doing other things in the meantime. :-) 

I like my mashed potatoes with red or yukon gold potatoes, because I think the textures lend themselves well to whipping and staying fluffy. When I'm making just one batch ahead of a meal, I choose one color, but for these big batches, I go for both. I grab a 5lb bag of each color and use about half and half in each batch.

You can easily adapt your favorite mashed potato recipe to this process, but here's the basic procedure.

Wash, peel, and cut-up about 3lbs of potatoes into roughly equal chunks. (This is all my stand mixer can handle at a time, so I work in three batches when I buy 10lbs of potatoes.)

Drop them in the steel pot in the Instant Pot.


Add a cup of water (or other liquid, like chicken broth).


Set your Instant Pot: manual, high pressure, 7 minutes. (Don't forget to make sure the valve is turned to "sealing."

After the Instant Pot gets up to pressure, the 7 minutes will begin. At the end of those 7 minutes, your Instant Pot will beep. This whole step will take around 15-20 minutes of hands-off time, so stick close, but you can do other stuff. Like dishes. Or Instagram. :-) 


When the Instant Pot beeps that the 7 minutes are up, do a quick release. If you're not familiar with the quick release, it can be a little intimidating. I jump every time, but it IS supposed to hiss, and steam IS supposed to pour out of it! When the steam has stopped and the little valve indicator floats, it's safe to open your Instant Pot.


That steel pot is HOT, so instead of pulling it out and dumping my potatoes into a colander, I just use a slotted spoon to dig the potatoes out and drop them into the bowl of my stand mixer. 

**If you have a hand mixer, you can TOTALLY make this a one-dish thing. I don't.**


From there, this is where it gets really customizable - make the potatoes however you usually do! (I know some people use combinations of milk, cream, salt, butter, cream cheese, sour cream, etc...) My standard is a stick of margarine for 3lb potatoes, and a TBSP or two of milk, added slowly until the potatoes reach a consistency I like. (The diet coke doesn't go in the potatoes, but it does go into the cook. Often.)


Scoop servings of potatoes into quart-size freezer bags - I use my ginormous Mama Bear mug to hold the bag steady and open while I work. :-)


Squeeze air out of the bag, flatten and spread potatoes out, and place flat in the freezer until hard. Once they're frozen solid, the bags can stand up or be shoved into random corners of the freezer. :-) 

I pull one or two out at a time and run a little warm water over the bag so I can remove the potato blob for thawing or reheating. You can put a frozen blob in a bowl in the fridge to thaw overnight, or just plan on microwaving a little bit longer. Microwave, covered, for 2 minutes. Remove, stir, recover, and continue to reheat for a minute at a time (stirring after each minute) until heated all the way through. Enjoy your easy, convenient, AND inexpensive side dish!


PS: If you love cooking ahead, I've reviewed some of our favorite freezer meals that I stashed while I was pregnant. :-)

PPS: If you have an Instant Pot that you love and are looking for great recipes for, I have a new-ish Pinterest board that I've been adding some delicious-looking recipes to, and making notes on them as I try them out.

PPPS: If you don't have an Instant Pot, you probably need one. ;-) 

Blog Design by Get Polished